 4197 views
 Alexis Wright . follow
Updated: 17-Oct-2019
How to Screenshot on Dell Laptop?
If you have little bit of knowledge about the steps, it is not a difficult job at all to take a screenshot on your Dell laptop. You are more likely to unaware of the steps if you are doing it for the very first time. Today we have taken the responsibility to put together all the possible ways of capturing Dell laptop screenshots. You will get to know the steps of taking and saving a photo of your Dell computer screen. Choose the method of making a screenshot on Dell Laptop that best suits your operating system.
Take a Screenshot of your Windows XP, Windows Vista, or Windows 7 laptop
1. Navigate to the page on which you wish to take a screenshot
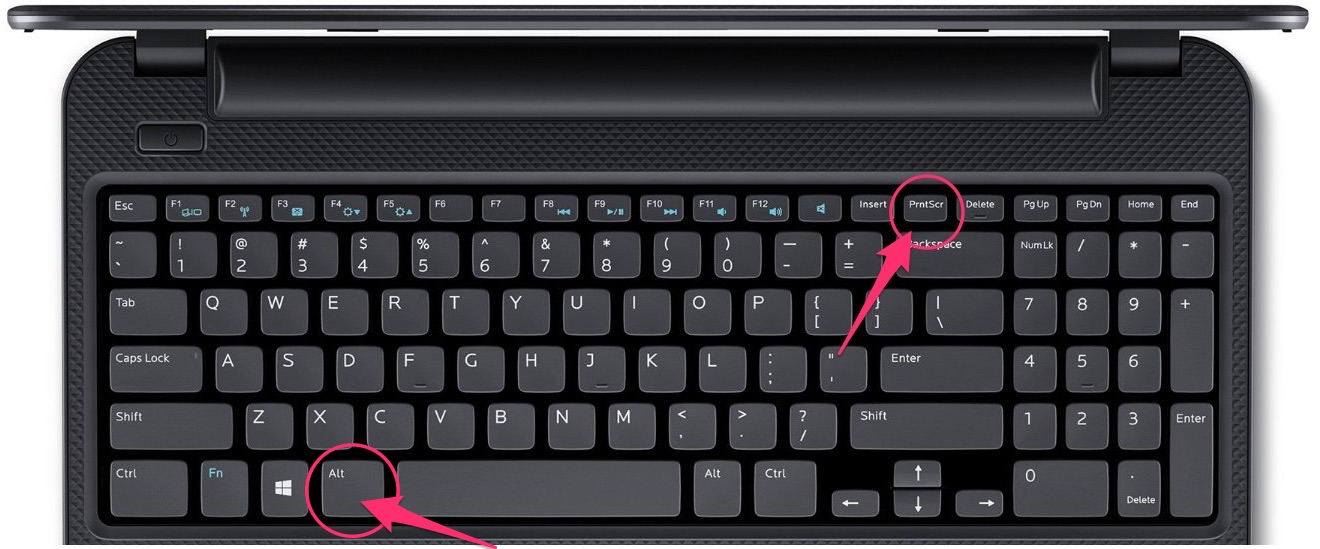
2. You will find the Print Screen key in the upper-right side of Dell keyboards – press this key
3. Now open the Paint program from the Start menu
4. Paste the image by pressing down Ctrl and V together
5. Go to the top-left corner of the Paint window and click on File
6. Save it by giving it a name
Take a Screenshot of your Windows 8 or Windows 10 laptop
1. Navigate to the page on which you wish to take a screenshot
2. You will find the Print Screen key in the upper-right side of Dell keyboards
3. Press this key along with the Win (Windows logo) key
4. Now Press Win and PrtScr keys simultaneously
5. Open the Start menu and type screenshots into Start
6. A folder entitled as Screenshots will appear at the top of the Start window
7. Click the Screenshots folder to find your screenshot inside
Take a Screenshot by using the Snipping Tool (not available for Windows XP)
1. Open the Start menu and type snipping tool into Start
2. Now you need to click on the Snipping Tool's icon – open it
3. Click Mode or â–¼
4. It will give you the screenshot shape options as Free-form Snip, Rectangular Snip, Window Snip, and Full-screen Snip
5. Click on a shape and change the border
6. Go to the left side of the Snipping Toolbar and click New
7. Click and drag your mouse across the screen
8. Release the mouse button now
9. Go to the top-left corner of the screenshot's page and click on File
10. Save it by giving it a name
Recent Question
- How to Get LinkedIn Articles Indexed by Google
- How to Fix Yahoo not sending emails problem
- How to change your username or display name on Roblox?
- How do I reset my Roblox password without email or phone number?
- How do I reset and change my Discord Password
- How to Cancel Directv Stream?
- someone Hacked my Facebook, What to do?
- How to connect your HP DeskJet Printer to Wireless Network?
- How do I request a refund for Google play card?
- How to do Scanning from my HP Printer to my Computer?
